Lovely Little Maple Leaf – Simplicity 6128

I am shocked at myself, absolutely shocked, it’s been nearly a month since I last posted!!! Gobsmacked face!

So back too it before the holidays take hold and Christmas is upon us…already is in my world! Very happy face!

Even though I have not been blogging I have been sewing….and plotting (more about that another day).

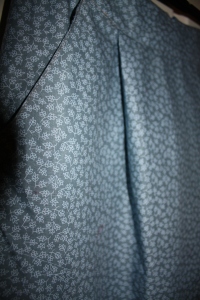
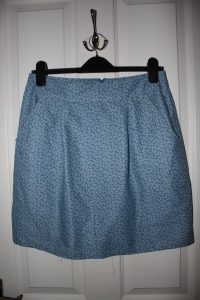
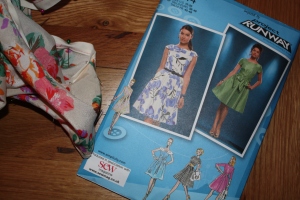
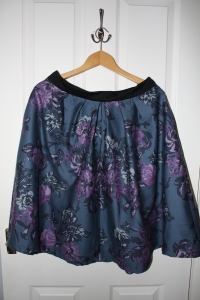
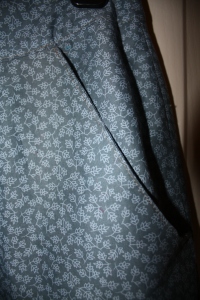
I ordered 3 patterns when simplicity new look had their patterns on sale and have already completed 2 of the patterns! Woohoo! So I shall begin with the lovely little skirt new look 6128. I had been looking for a skirt pattern for a while (and acquired two in that one shopping session) and thought this one was cute having the pleats at the front to create a slight tulip effect, the pockets- I hadn’t tried this style of pockets before and wide waist band to flatten the stomach – hurrah!

IMG_2269 6128 pockets

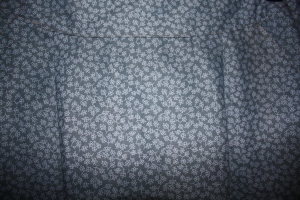
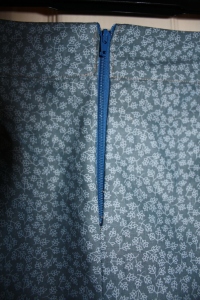
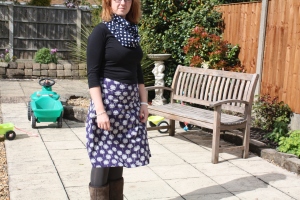
Also it was squeezed out of just under a meter of fabric. This was a scrap of material found in the dress pile and must have cost pennies, and more than worth it it was. I love the maple leaves and thought it was very autumnal, now it’s past autumn and looks cute with boots, tights and a woolly jumper (with a diamante reindeer on obviously!….you think I’m kidding he he he!!) It was very simple to put together and by doing the shorter version (oooo cheeky) didn’t need to faff with the slit at the back, not that they are too much hassle. What a match the zip is too!

6128

There are two issues which spring to mind. The first being the pleats are too close together at the centre front of the skirt and it poofed out toooo much! I moved them closer to the pockets, just the same width of the pleat again and it worked a treat flattening out the front of the skirt!

IMG_2271 IMG_2272

The other would be to try this pattern using a more flowing type of fabric to see how it falls!! And if using a stiffer piece of cotton like my lovely maple leaves, lining the fabric prevents the skirt sticking to tights at front when walking! I cannot stand this! This was a really quick skirt to put together and so easy! I’m made up with the outcome and  I shall be wearing my new skirt with woolly tights and loving it!
Discovering Burda Mag

As a relative newbie to sewing (under a year), I had heard of, but never seen a copy of Burda magazine until I intentionally went into town (doesn’t happen often) and into WH Smith (again doesn’t happen often) with the belief that it would be the only place I could probably find it! And I was right!

IMG_3124[1]

And a big oooooooo….. when I opened it to discover 15 patterns all with the paper pattern and instructions! I started scanning the pages and reflecting on my fabric stash….. until I opened up the pattern sheet and got a little daunted! I picked  what I consider to be simple piece….at this stage I have not started stitching… with only two pieces to cut out from the pattern sheet I wouldn’t scare myself off!

IMG_3153[1]

A few things to bear in mind…..

You must be focussed to follow the lines, I even had the idea of highlighting the lines for a little extra focus! And I did it first thing in the morning to avoid distractions.

Use weights to hold tracing paper onto the pattern paper….pots of playdough very useful!

IMG_3156[1]

Don’t forget to add seams!!!! Oooops to me for getting which way was up and not adding enough for the hem, so, erm, may end up with a slightly shorter skirt than intended!

I then wrote all instructions on each cut out including whether seam allowance was included, which way was up and the grainline (just like you would get on a paper pattern!) the size, incase like me you scoff too much at certain times of year (….holidays are coming, holidays are coming!) and then when I sandwich bagged it up I wrote the mag issue on the front of the bag and pattern name/ number in permanent marker……blimey I feel very organised!!!!

IMG_3159[1]

Wish me luck on the make!!!


Frustrated seamstress!

There is nothing more annoying than starting a dress and not being able to finish it! When I start a project I aim to get it finished! Have I made my point?

I started thinking about this dress as soon as I bought the bright pink material on the Birmingham meet-up and on Thursday took some patterns to sewing club and had a natter with the ladies and had a nosey at what Hannah was making…..got a little inspiration there! And on Saturday afternoon, when it was a ‘shock, horror’ wet and windy afternoon, I got cutting.

IMG_2137

So excited to have made my first semi circle skirt, thanks to JoJo at Stylefactory for digging out a pattern! They are such a flattering shape skirt, from what I can see pinning the unfinished dress to myself! I adapted a pattern of a bodice, well I chopped the top of the bodice off and kept fiddling with it to make a sweetheart neckline, I then attached a netted section to create something like this,

Think this is a stunning dress! I WANT TO MAKE ME ONE!!!

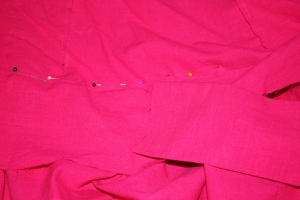
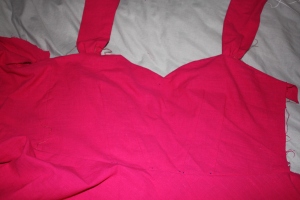
but decided it was too dressy and unlikely I would wear it very often (bear it mind it is shocking pink!) and it looked a bit wedding dressy as the back was in two triangular sections- it was lovely and if I’m ever going anywhere ooober dressy I will be using those neckline sections which I have kept! So I figured straps for a sundress! With the aid of a little interfacing, which I just laid the dress over some more of the pink material and drew a line the shape of the neckline! Made overly long straps which I gathered for the front and while holding up the front of the bodice marked where I wanted them and stitched them in.

IMG_2139

Now I’m itching to try it on and see how it’s all come together, especially as I have made up the majority of the dress myself, which is quite a new trick for me, as I really have been relying on patterns! But I have to try and stop dancing on the spot until my Mum (who knows what she’s doing) can pop round and help me out pinning the straps into the interfacing in the correct spot!

More vintage making!

IMG_1997
I posted recently about the vintage patterns I had being buying on ebay. Well, last weekend I took one of my favourite trips to the fabric shop with some specific ideas of material and colours for the skirt I loved but…..really did not have fun when I got there! I usually love a browse, mooching through the piles of fabric weighing up the different patterns I have…though I did take a shopping list! But yuck! The pay and display metre was not working and ate my money so I only had one hour, which always puts me on edge as the traffic wardens of the City of Liverpool are fierce!!!! With my time limit eating away in my mind, and the fact I went unprepared with little cash and having to spend over a certain amount to use cards and not being able to take materials go between floors to pay for it…..oh it was stressful!
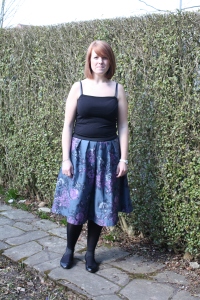
I eventually picked up on this patterned fabric in the last lot of materials I got round to, always in the last place you look! I loved the pattern and thought it would work wonderfully with the skirt pattern and I would get the opportunity to work on matching a pattern, until I got it home and realised I had not studied the pattern properly and needed the main sections of material to be cut on the bias (across the grain – see I’m learning!) But this pattern on the fabric for me was only going to work along the grain, so as I seem to be doing alot lately, I adapted the pattern. I cut the material and made the skirt following the pattern instructions and it obviously fell very structured and straight which made it stick out in an aline shape ALOT. So, I turned the skirt inside out and repinned the shape to a slimmer aline from the bottom of the yoke and it has made a lovely aline shape skirt which I am really happy with.

On a windy, cold day in May!

On a windy, cold day in May!

Obviously there is always something I would like to work on as I’m improving my sewing skills and with this material I was hoping to have a go at matching patterns, which was impossible as the pattern was too erratic. Without studying it, which I couldn’t in my brief time fabric shopping, I could not see the repetition was sparse and matching up the rows was …….difficult.
I am happy with the outcome, especially that I had a purple zip (matching the skirt) in my stash and put it in super easy! I’ve been wearing the skirt, a true sign of a happy outcome and will be using this pattern (the correct way, with the correct material) in the near future! Happy sewing!

Vintage Wonders!

I have discovered vintage patterns on ebay….and eventually had to stop mooching as it was going to end up costing me a fortune! But over the past couple of weeks I’ve bought some lovely patterns at incredible prices…..and have already made up two patterns, slightly adapted to modernise (they are from the 70’s and 80’s).

IMG_1986

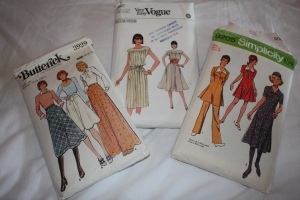
I chose these 3 patterns as they look similar to more modern patterns I had seen and I thought I would suit them and they would suit my ability level.

Vogue 8347 – Not even cut…..amazing!

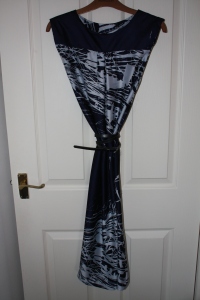
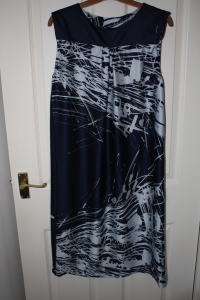
The Vogue pattern has a very similar dress shape to what is in a lot of the shops but have elastic running across the waist (I’m planning on adding this to the dress in the near future). I took the shoulders in nearly half way across and didn’t want the button up neckline feature, so just stitch the front yoke to the back. I also reinforced the yoke with interfacing, which I’m now debating the decision as it would be nice even slinkier round the neckline. Following the pattern measurement there was a lot of material and so I cut the material in about 2 inches from my size to make it a closer fit. The material has been hanging around my fabric stash since early March and I kept debating making a circle skirt with it, glad I didn’t as this dress gave me achance to practice my french seams (getting much neater and smaller) and I think it falls lovely and shows off the pattern, if the material was stiffer it would be much more sticky out, though I do want to try it with a thin flowery cotton. I really like the outcome and can’t wait to wear  it out, maybe even with black tights and boots as the weather  will not warm up!!!

Cinched waist, looks lovely with a belt.

Cinched waist, looks lovely with a belt.

Pattern on show.

Pattern on show.

Simplicity 9205- Cut and ready to go, in great condition and I actually did more damage to it the first time I used it than it had in over 30 years! Ooops!

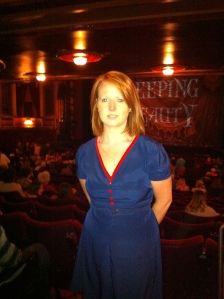
I was looking for a button down dress, which I’m being really fussy about, and though the buttons on this dress are decorative, they achieved a look similar to what I wanted and I liked the idea of making a four panelled skirt, as I’ve seen a few of these around on other sewers blogs. The picture of this dress does not do it justice, as it is nicely fitted around the waist and the skirt then flares out. You may have been able to see this better if I hadn’t altered the neckline by widening and lowering the v. This was the first time I had made a v neck with bias binding though and I was made up with the outcome. I love the contrast of the red and navy (and i’m a big fan of buttons which look like sweets) and wore this with patent red pumps! I am also in the process of making a skirt from the pattern. I need to lower the waistband, as I cut to high up the waist from the pattern, reinsert the zip and hem it!

Wearing my dress to the theatre to see the truly amazing Matthew Bourne's Sleeping Beauty! I also need to learn how to pose!

Wearing my dress to the theatre to see the truly amazing Matthew Bourne’s Sleeping Beauty! I also need to learn how to pose!

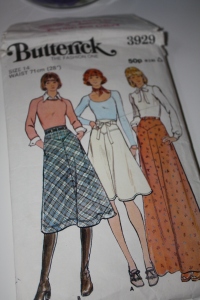
Butterick 3929 – In incredible condition, cut and the paper is thinner than when fresh, but in great condition.

This pattern I love as the panel across the stomach looks like it will be really flattering. It did only turn up this morning though, so I’m afraid I have not had time to attack it yet.

I love that people have used and loved patterns and are passing them on (for a small cost – but who wouldn’t!). These patterns have history and with slight adaptations they can be brought back to life and loved again!

Simplicity k2444 adaptations.

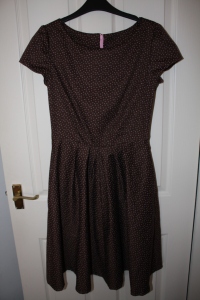
You know I love this pattern, the fit and the pleats I love to cinch in my waist and though there are no photos of me yet wearing the dress, as the occassion has not yet arisen for it’s first outing, I keep trying it on and having a little ‘oooo I made that’. There is now a skirt, dress and dah dah! a peplum top!

Looks so pretty on, fitting in at the waist.

Looks so pretty on, fitting in at the waist.

Skirt taken from Simplicity K2444 pattern

Skirt taken from Simplicity K2444 pattern

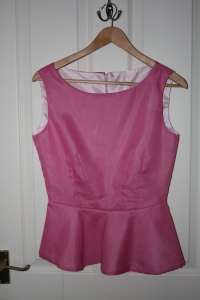
I was planning on using up the leftovers of the brown with pink dot material I used for the dress, but wasn’t sure how I’d make the peplum and whether there would be enough material – heads up there isn’t – so decided on having a practice go with some leftover pink bed sheeting material from a teepee I made for my cousins kids, and oh my ….check out the outcome!

The peplum top!

The peplum top!

I ended up lining the pink as it was quite see through with some white lining, and it is a little on the snug side…it’s so difficult to measure things on yourself, getting pins stuck in me and how do you pin where the seam or zip will meet around your back! Anyway love it and it looks fab with a camel jersey pencil skirt (another easy peasy home made skirt kinda following a tutorial from cotton and curls blogspot) .

So happy with this pattern and I’ve said it before and I’ll say it again I think it will be used a lot in the future x

Who’s afraid of the big bad buttonholes? Not me!!!!


Tilly's Picnic Blanket Skirt, well..... mine.

Tilly’s Picnic Blanket Skirt, well….. mine.


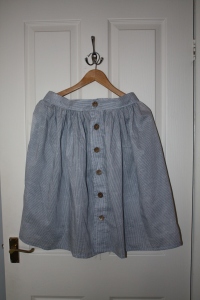
When I started sewing I thought ooooo this is great having totally individual clothing! But I’ve got a feeling the knew found fame of sewing because of the Great British Sewing Bee (I think I mention it every blog post recently) may have changed that….. and I’ve made The Picnic Blanket Skirt from Tilly and The Buttons blog……at least it’s all different materials.
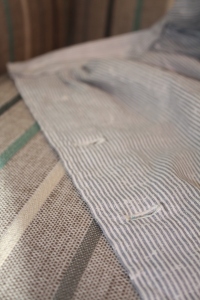
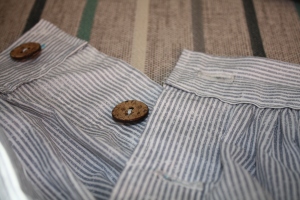
Well I loved the skirt and it all seemed simple enough, but I’d never made button holes before and turns out they are easy peasy! As long as the measuring out of the buttonholes is in the right place and there is an instruction book with the sewing machine which gives a step by step guide…..and luckily I had both!

IMG_1929

Tilly’s instructions were really good for measuring out the buttonholes, I did have to wing it a bit with where to then put the buttons. First attempt at the top button to get the placket to lie neatly over the top of each other was pretty rubbish, but when I clocked on the button will pull straight to the furthest point of the buttonhole I just went down all the buttonholes with the plackets lying on top of each other and marked a dot at the point I wanted the button on the placket underneath.
I’m glad I plucked up the courage….it always scares me making holes in my clothes not knowing how it’s going to turn out! Turns out it’s all good!

IMG_1928

Sew Mag Project….kinda!

IMG_1592

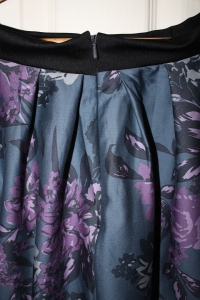
Love the free pattern from Sew mag this month! I just got it out to have a nosey at last night and remembered a floral print I had which I bought to make a skirt…..Now I had never used a pattern before, so when the skirt section of the pattern did not look too difficult (bodices still daunt me) I pulled out the material and could just about fit the skirt on so off I went…….

IMG_1618

I seem to be getting it wrong measuring myself as I would definitely use a size smaller when I make the skirt for the dress, as it hangs on my hips (I still love it). I made the waist band with some jersey knit I had left over and used a concealed zipper – which I’m amazed at, my first concealed zipper foot zip!

IMG_1619

Overall I love this skirt, it hangs gorgeous because of the pleats! Wwill defo be making more and attacking the dress soon xx

I will get some pics of me wearing my makes eventually…..will have to rope someone in to take some photos!